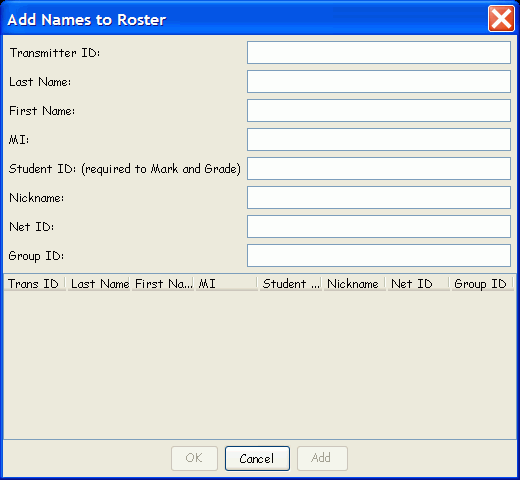
Add Names
The Add Names function is used
to build a Roster in the PRS application, or to add names to the existing,
associated Roster. If you build the Class Roster using the Add Names Button,
the Roster will not be named until you have completed the entire Class
definition and clicked on the OK button to save it. You will be prompted
to name the Roster at that time.
Click on the Add Names  Function Button at
the bottom of the Class definition Roster
tab when you want to manually create a Roster for the Class you are defining.
Simply provide the studentís profile information, being sure to include
his or her PRS Transmitter ID number. Click on the Add
button to save it to the PRS database in the PRS/Roster
directory. The Add Names dialog is persistent, allowing you to add as
many profiles as needed to the Class Roster. As each profile is added,
it will display in the .
Click on the OK button when you
have finished adding the student profiles. You can use the Add Names function
at any time to add profiles to the existing Class Roster identified in
the Roster field, or to edit a profile selected in the Roster List Window.

 Function Button at
the bottom of the Class definition Roster
tab when you want to manually create a Roster for the Class you are defining.
Simply provide the studentís profile information, being sure to include
his or her PRS Transmitter ID number. Click on the Add
button to save it to the PRS database in the PRS/Roster
directory. The Add Names dialog is persistent, allowing you to add as
many profiles as needed to the Class Roster. As each profile is added,
it will display in the Add Names to Roster
List Window.
Click on the OK button when you
have finished adding the student profiles. You can use the Add Names function
at any time to add profiles to the existing Class Roster identified in
the Roster field, or to edit a profile selected in the Roster List Window.